An illustrated walk-through of RecipeBox and its features.
Table of Contents
Home screen
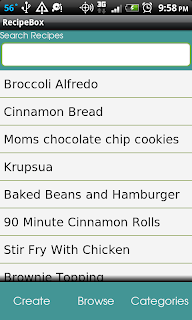
RecipeBox opens to this screen. It consists of three parts: A search bar, a recipe list, and a row of buttons along the bottom.
Search Bar
The search bar at the top of the screen can be used to search for a specific recipe. As you type, suggestions will
appear underneath the search bar. Clicking on a suggestion will open that recipe. You can also type the full name of a
recipe, then hit the enter button on your keyboard. This will also open the recipe.
As a bit of a hidden feature, typing the name of a recipe that does not yet exist and hitting enter on the keyboard
will pop up a dialog asking if you want to create a recipe with the name you just typed. This is a handy shortcut when you
want to make a new recipe.
Recipe List
The recipe list on the main screen shows recipes sorted by when you last viewed the recipe. This is a convenient way to access the recipes that you use frequently.
Bottom Buttons
Clicking the create button will create a blank recipe and open it so that you can fill in the recipe's details.
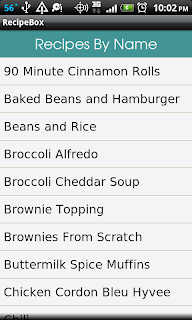
The browse button will take you to a recipe list sorted alphabetically.
The categories button allows you to view recipes by category.
Browse
In this view, all recipes are available and listed alphabetically. Additional options are available by clicking on the phone's menu button.
Menu Options
The Backup option allows you to save a snapshot of your current recipes. You can also load previous snapshots from this view. This is how you would transfer your recipes to a new device.
The Export option allows you to package multiple recipes into a bundle and share them with someone else via email or bluetooth.
Categories
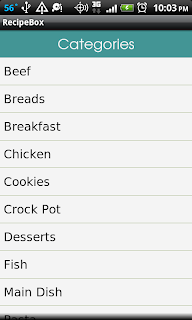
RecipeBox allows you to organize your recipes by category. There are several categories included by default. You can also add custom categories through the menu.
Click on a category to view the recipes in that category.
Menu Options
Choose the Edit option to modify your categories.
Edit Mode
When in edit mode, you can add, remove, and rename your categories.
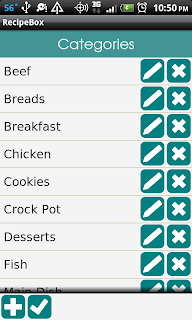
Click the "+" button to add a new category. A dialog will open asking what you would like to call your new category.
Click the "pencil" icon next to a category to edit the category's name.
Click the "x" icon next to a category to delete the category. A confirmation dialog will be shown before the category is deleted.
To exit edit mode, click the "check" icon along the bottom of the screen.

Menu Options
Choose the Edit option to add or remove recipes from the category.
Edit Mode
When in edit mode, you can add and remove recipes from the category.
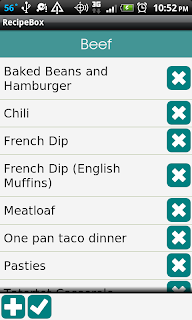
Click the "+" button to add a recipe to the category.
Click the "x" icon next to a recipe to remove the recipe from the category. A confirmation dialog will be shown
before the recipe is taken out of the category.
To exit edit mode, click the "check" icon along the bottom of the screen.
Recipe Info
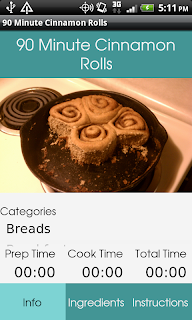
A recipe is divided into three sections. The first section is the general info screen. Basic information about the recipe
is shown here, such as an image and description, any categories the recipe is in, related recipes, and prep / cook times.
Recipe Image
Each recipe may have a single image associated with it. Click the image to view it at full detail.
While the image will usually be used to show what the recipe looks like when complete, you could also take an image of a
recipe directly from a cookbook. This is a quick way to add recipes if you do not want to write them out manually.
Categories
A recipe may be in any number of categories. From the recipe's info page, clicking on the category name will take you to that category. Pressing the back button on your phone will return you to the recipe.
Related Recipes
A recipe may be linked to recipes that it is related to. For example, you may wish to link a cake recipe with the recipe
for frosting.
Clicking on the name of a related recipe will take you to that recipe. Pressing the back button will return you to the
original recipe.
Prep and Cook Time
RecipeBox allows you to specify a prep time and a cook time for a recipe. The combined prep + cook time is also displayed.
-
The Share option allows you to share the recipe with friends and family. The main supported method for sharing recipes
is via email. When sharing a recipe via email, the body of the email will be filled with a formatted version of the recipe.
This allows you to share a recipe with anyone, even those who do not have RecipeBox.
RecipeBox will also attach a file to the email which can be opened by recipients with RecipeBox to import the recipe directly into their device. This makes it easy to share recipes without having to take the time to re-enter them.
One thing to note: the "Gmail" mail app refuses to send the attachment for some reason, so use the default "Mail" app if you
want to share recipes in a way that can be imported by other RecipeBox users.
Recipes can also be shared using Bluetooth to devices that you have paired with.
-
The Edit option allows you to edit a recipe. There are two options when editing a recipe. You may either select
"Edit this recipe" to modify the current recipe, or you may select "Create variant" to make a copy of the recipe and edit
the copy.
The "Create Variant" option is helpful if you were experimenting with a recipe and did something differently. You can
record your new version of the recipe without altering the original version.
-
The Delete option allows you to remove a recipe you no longer want. A confirmation dialog will be shown before the recipe
is deleted.
Note that this completely removes the recipe from RecipeBox.
Edit Mode
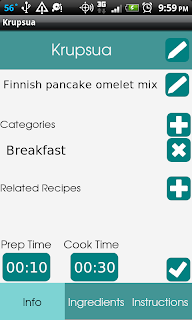
All information on the recipe's "info" page may be edited. Throughout the app, four main icons are used to specify actions:
- "+" icons indicate places where you can add a new item.
- "pencil" icons indicate places where you can edit an existing value.
- "x" icons indicate values that can be deleted. Confirmation dialogs will be shown before the action takes effect.
- "checkmark" icons are used to complete an action and exit edit mode.
Recipe Ingredients
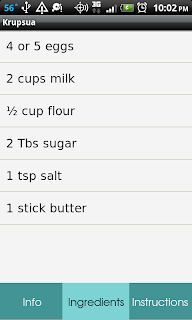
The ingredients needed for the recipe are listed in this view. Ingredients can be added, removed, edited, and reordered
when in edit mode.
Menu Options
See Recipe Menu Options
Edit Mode
Ingredients may be added, removed, edited, and reordered while in edit mode.
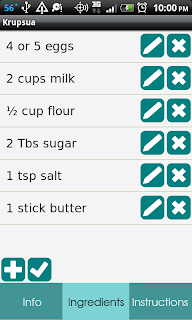
- To add an ingredient, press the "+" icon. This will open an edit ingredient dialog.
See Edit Ingredient Dialog for more details.
- To edit an ingredient, press the "pencil" icon next to that ingredient. This will open an edit ingredient dialog.
See Edit Ingredient Dialog for more details.
- To remove an ingredient from the recipe, press the "x" icon next to that ingredient. A confirmation dialog will be shown
before the ingredient is removed.
- To reorder ingredients, press and hold on the ingredient you wish to move. After about 2 seconds, a set of arrows will
appear next to the ingredient, allowing you to move the ingredient up and down within the list.
- To exit edit mode, press the "checkmark" icon.
Edit Ingredient Dialog
Ingredients within a recipe consist of two parts, the amount and the ingredient. The recipe ingredient is represented as
two parts so that RecipeBox can track which ingredients you use most frequently and suggest them to you when you start typing
the ingredient. This allows you to quickly select the ingredient you want after entering only two or three characters.
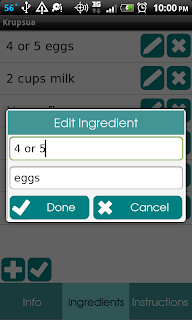
As you begin typing in the ingredient field, suggestions will appear. Click on a suggestion to choose it.
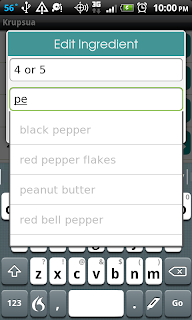
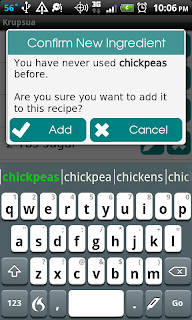
RecipeBox tracks which ingredients you use. So if you enter an ingredient it has never seen before, it will ask you
to confirm that you want to add the ingredient. This is convenient for catching misspellings. Since most ingredients appear
in multiple recipes, I've found that you don't run into this message very often after you have a few of your recipes entered.
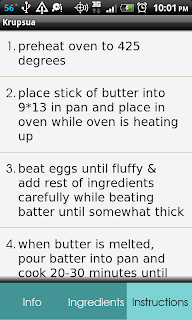
Recipe Instructions
The instructions for the recipe are listed in this view. Instructions can be added, removed, edited, and reordered
when in edit mode.
Menu Options
See Recipe Menu Options
Edit Mode
Instructions may be added, removed, edited, and reordered while in edit mode.
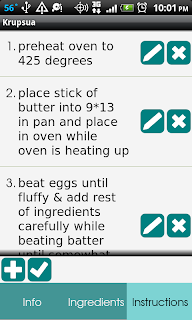
- To add an instruction, press the "+" icon. This will open a dialog where you can enter the instruction text.
- To edit an instruction, press the "pencil" icon next to that instruction. This will open a dialog where you can edit the
instruction text.
- To remove an instruction from the recipe, press the "x" icon next to that instruction. A confirmation dialog will be shown
before the instruction is removed.
- To reorder instructions, press and hold on the instruction you wish to move. After about 2 seconds, a set of arrows will
appear next to the instruction, allowing you to move the instruction up and down within the list.

- To exit edit mode, press the "checkmark" icon.


